Web UI
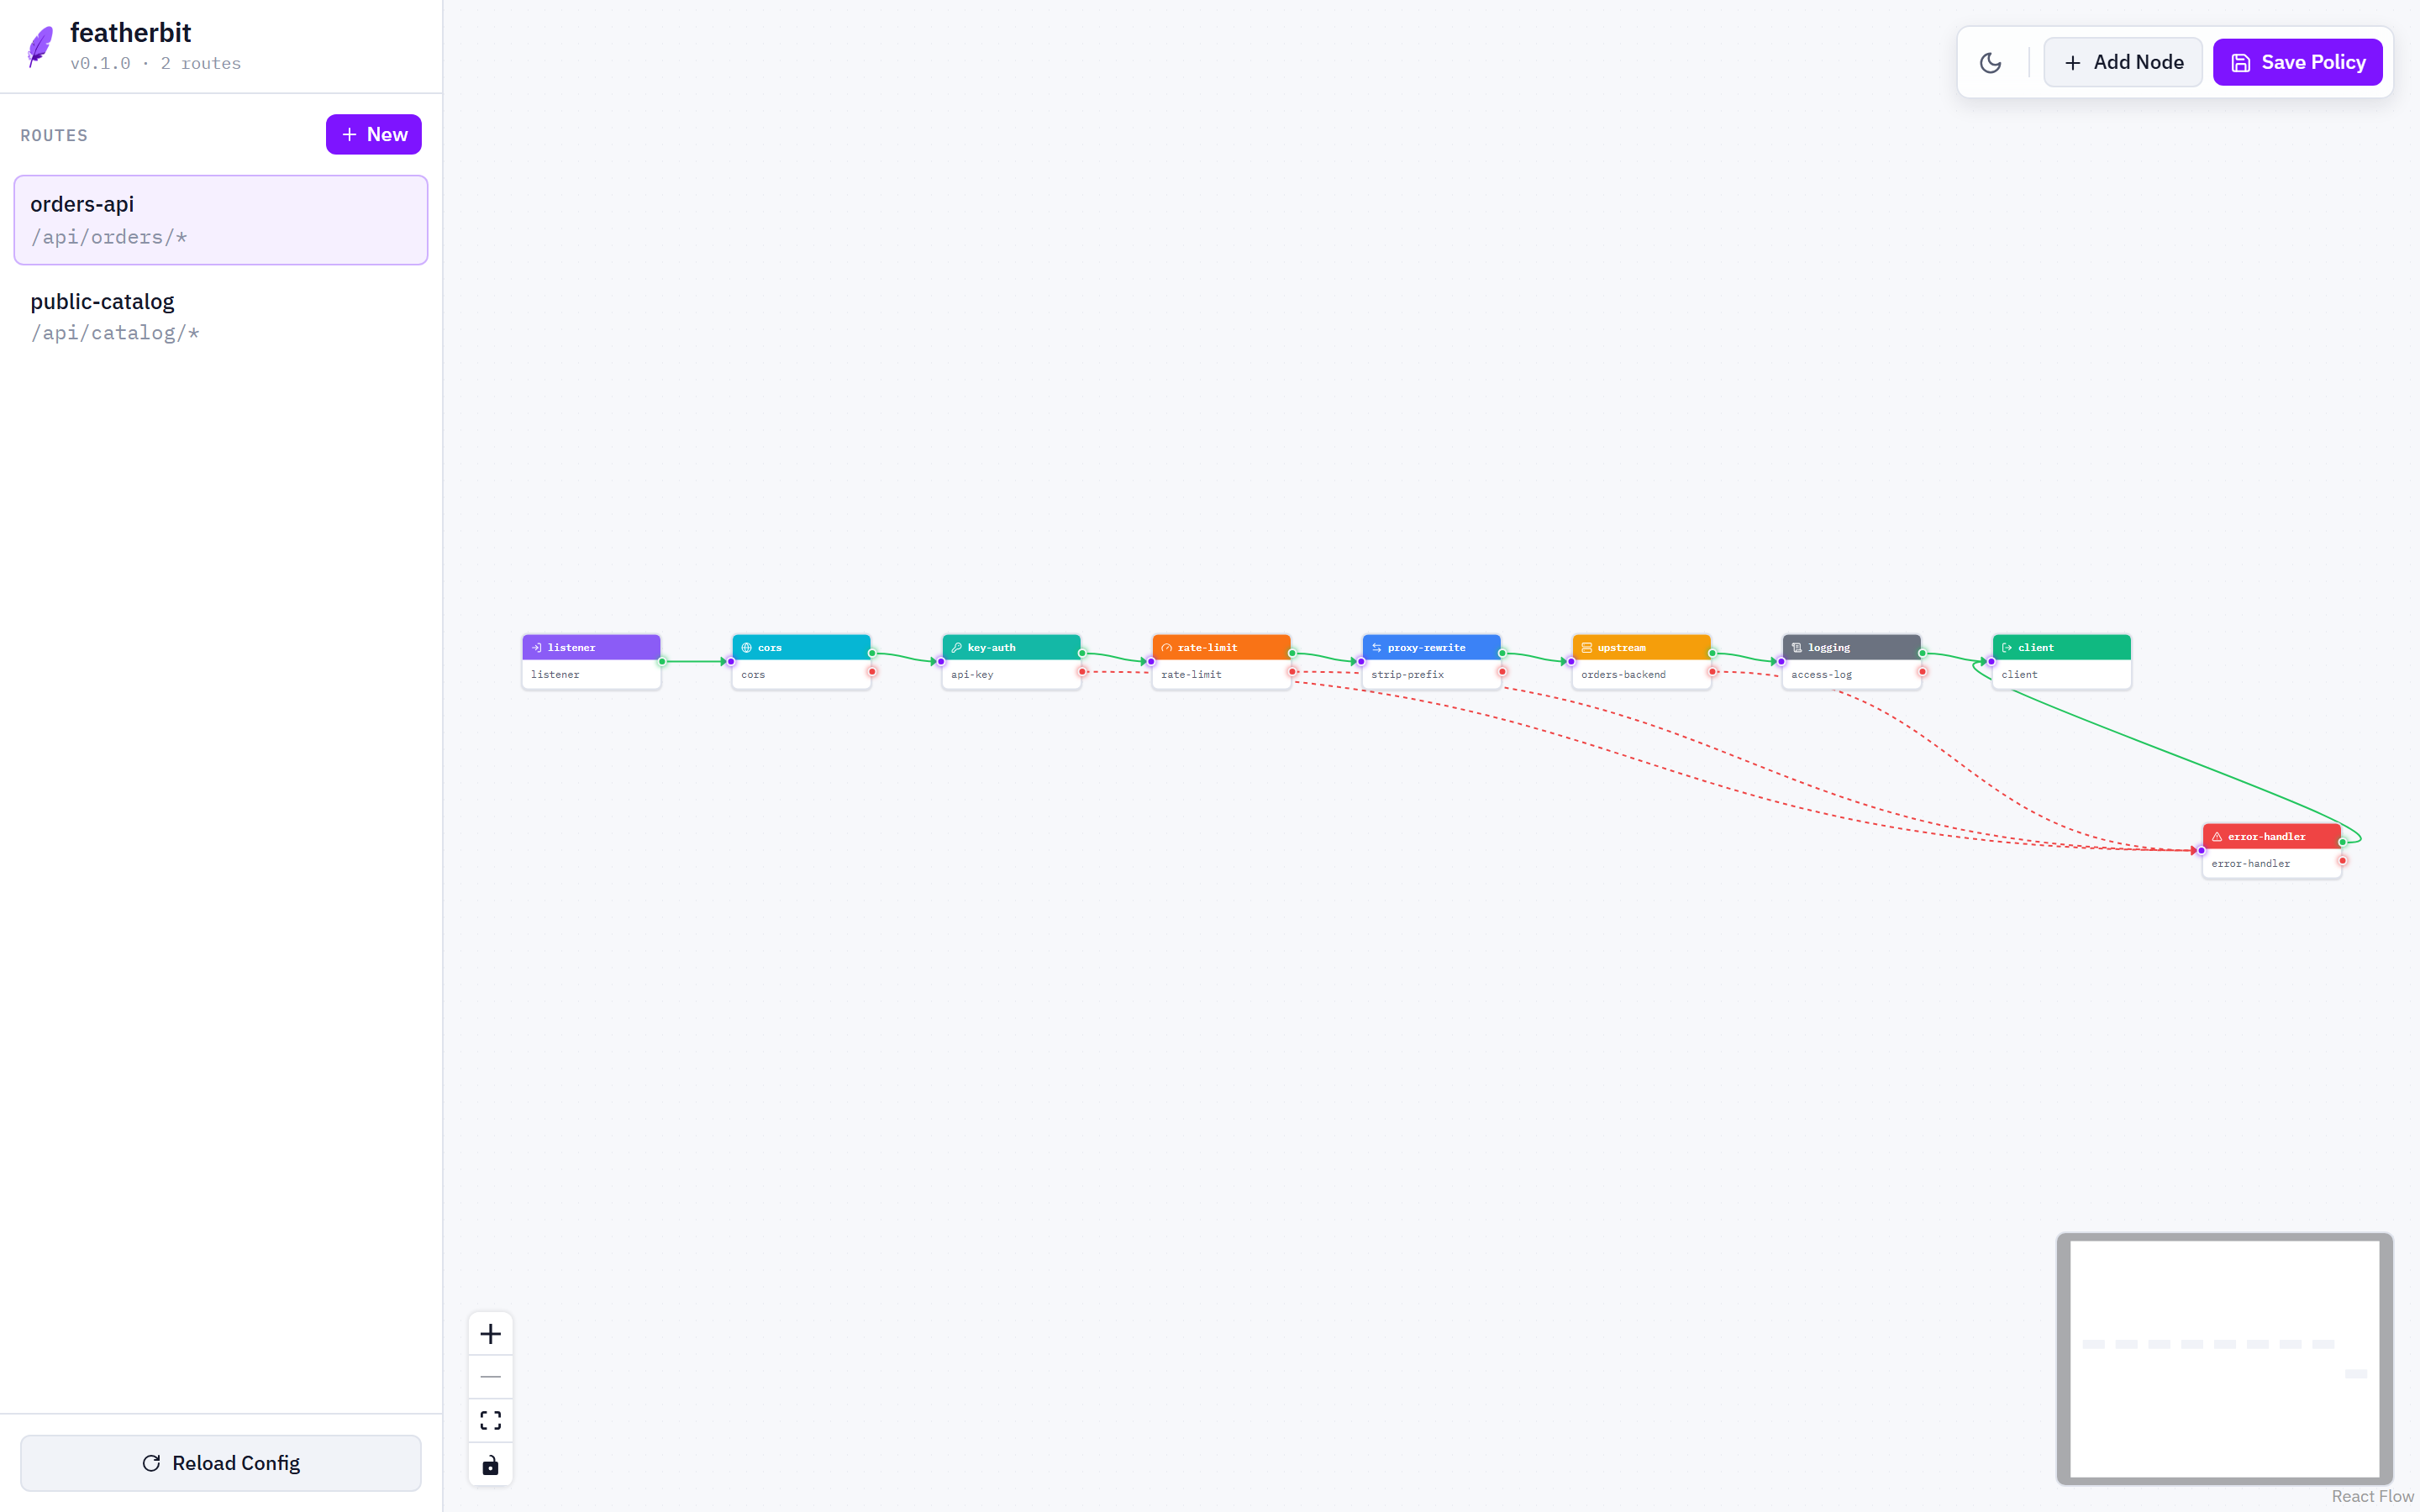
featherbit ships a node-graph policy editor as a React SPA (React 19, TypeScript, Vite, React Flow) embedded in the gateway binary — no separate web server. Open the admin port in a browser:
open http://localhost:9090
How it is served
The UI is compiled into the binary at build time (ui/dist/, embedded via rust-embed) and served by the admin server as the fallback for any path not matched by the admin API. Unknown paths fall back to index.html so client-side routes resolve within the SPA.
The static assets themselves are served without authentication; the SPA's own calls to the admin API carry HTTP Basic credentials (see Admin API).
Editor workflow
- Select a route from the sidebar to open its routing policy on the canvas.
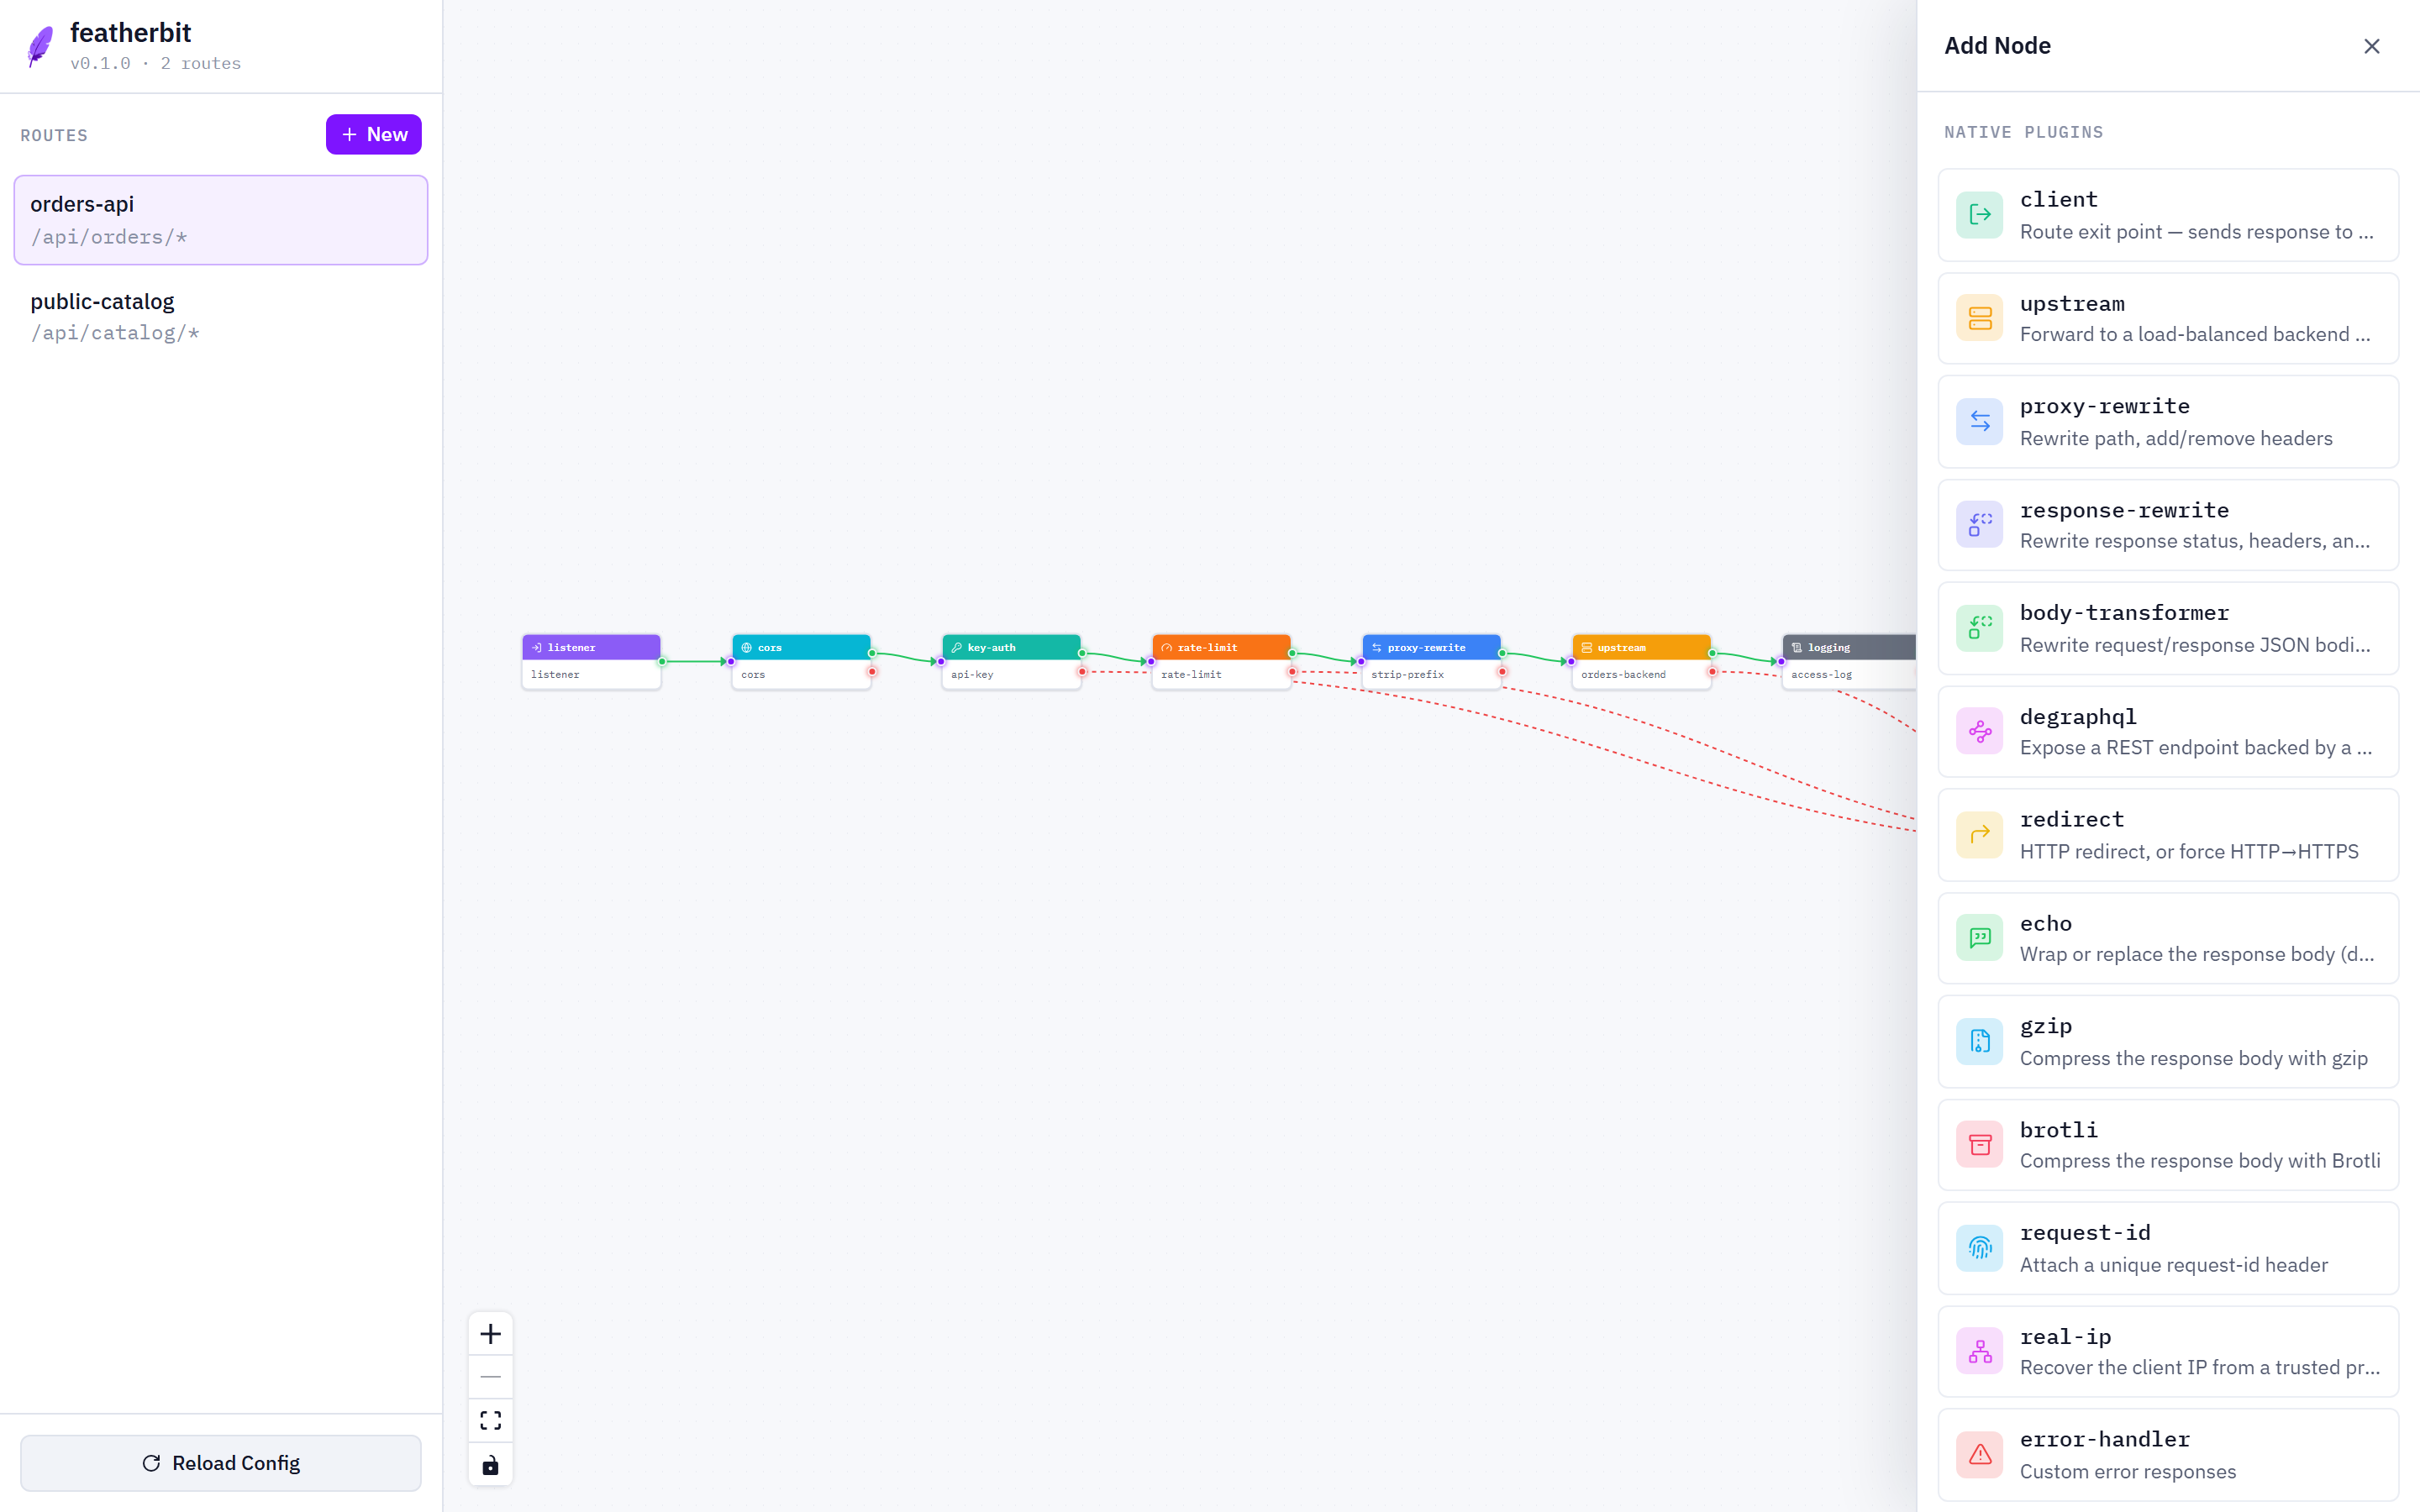
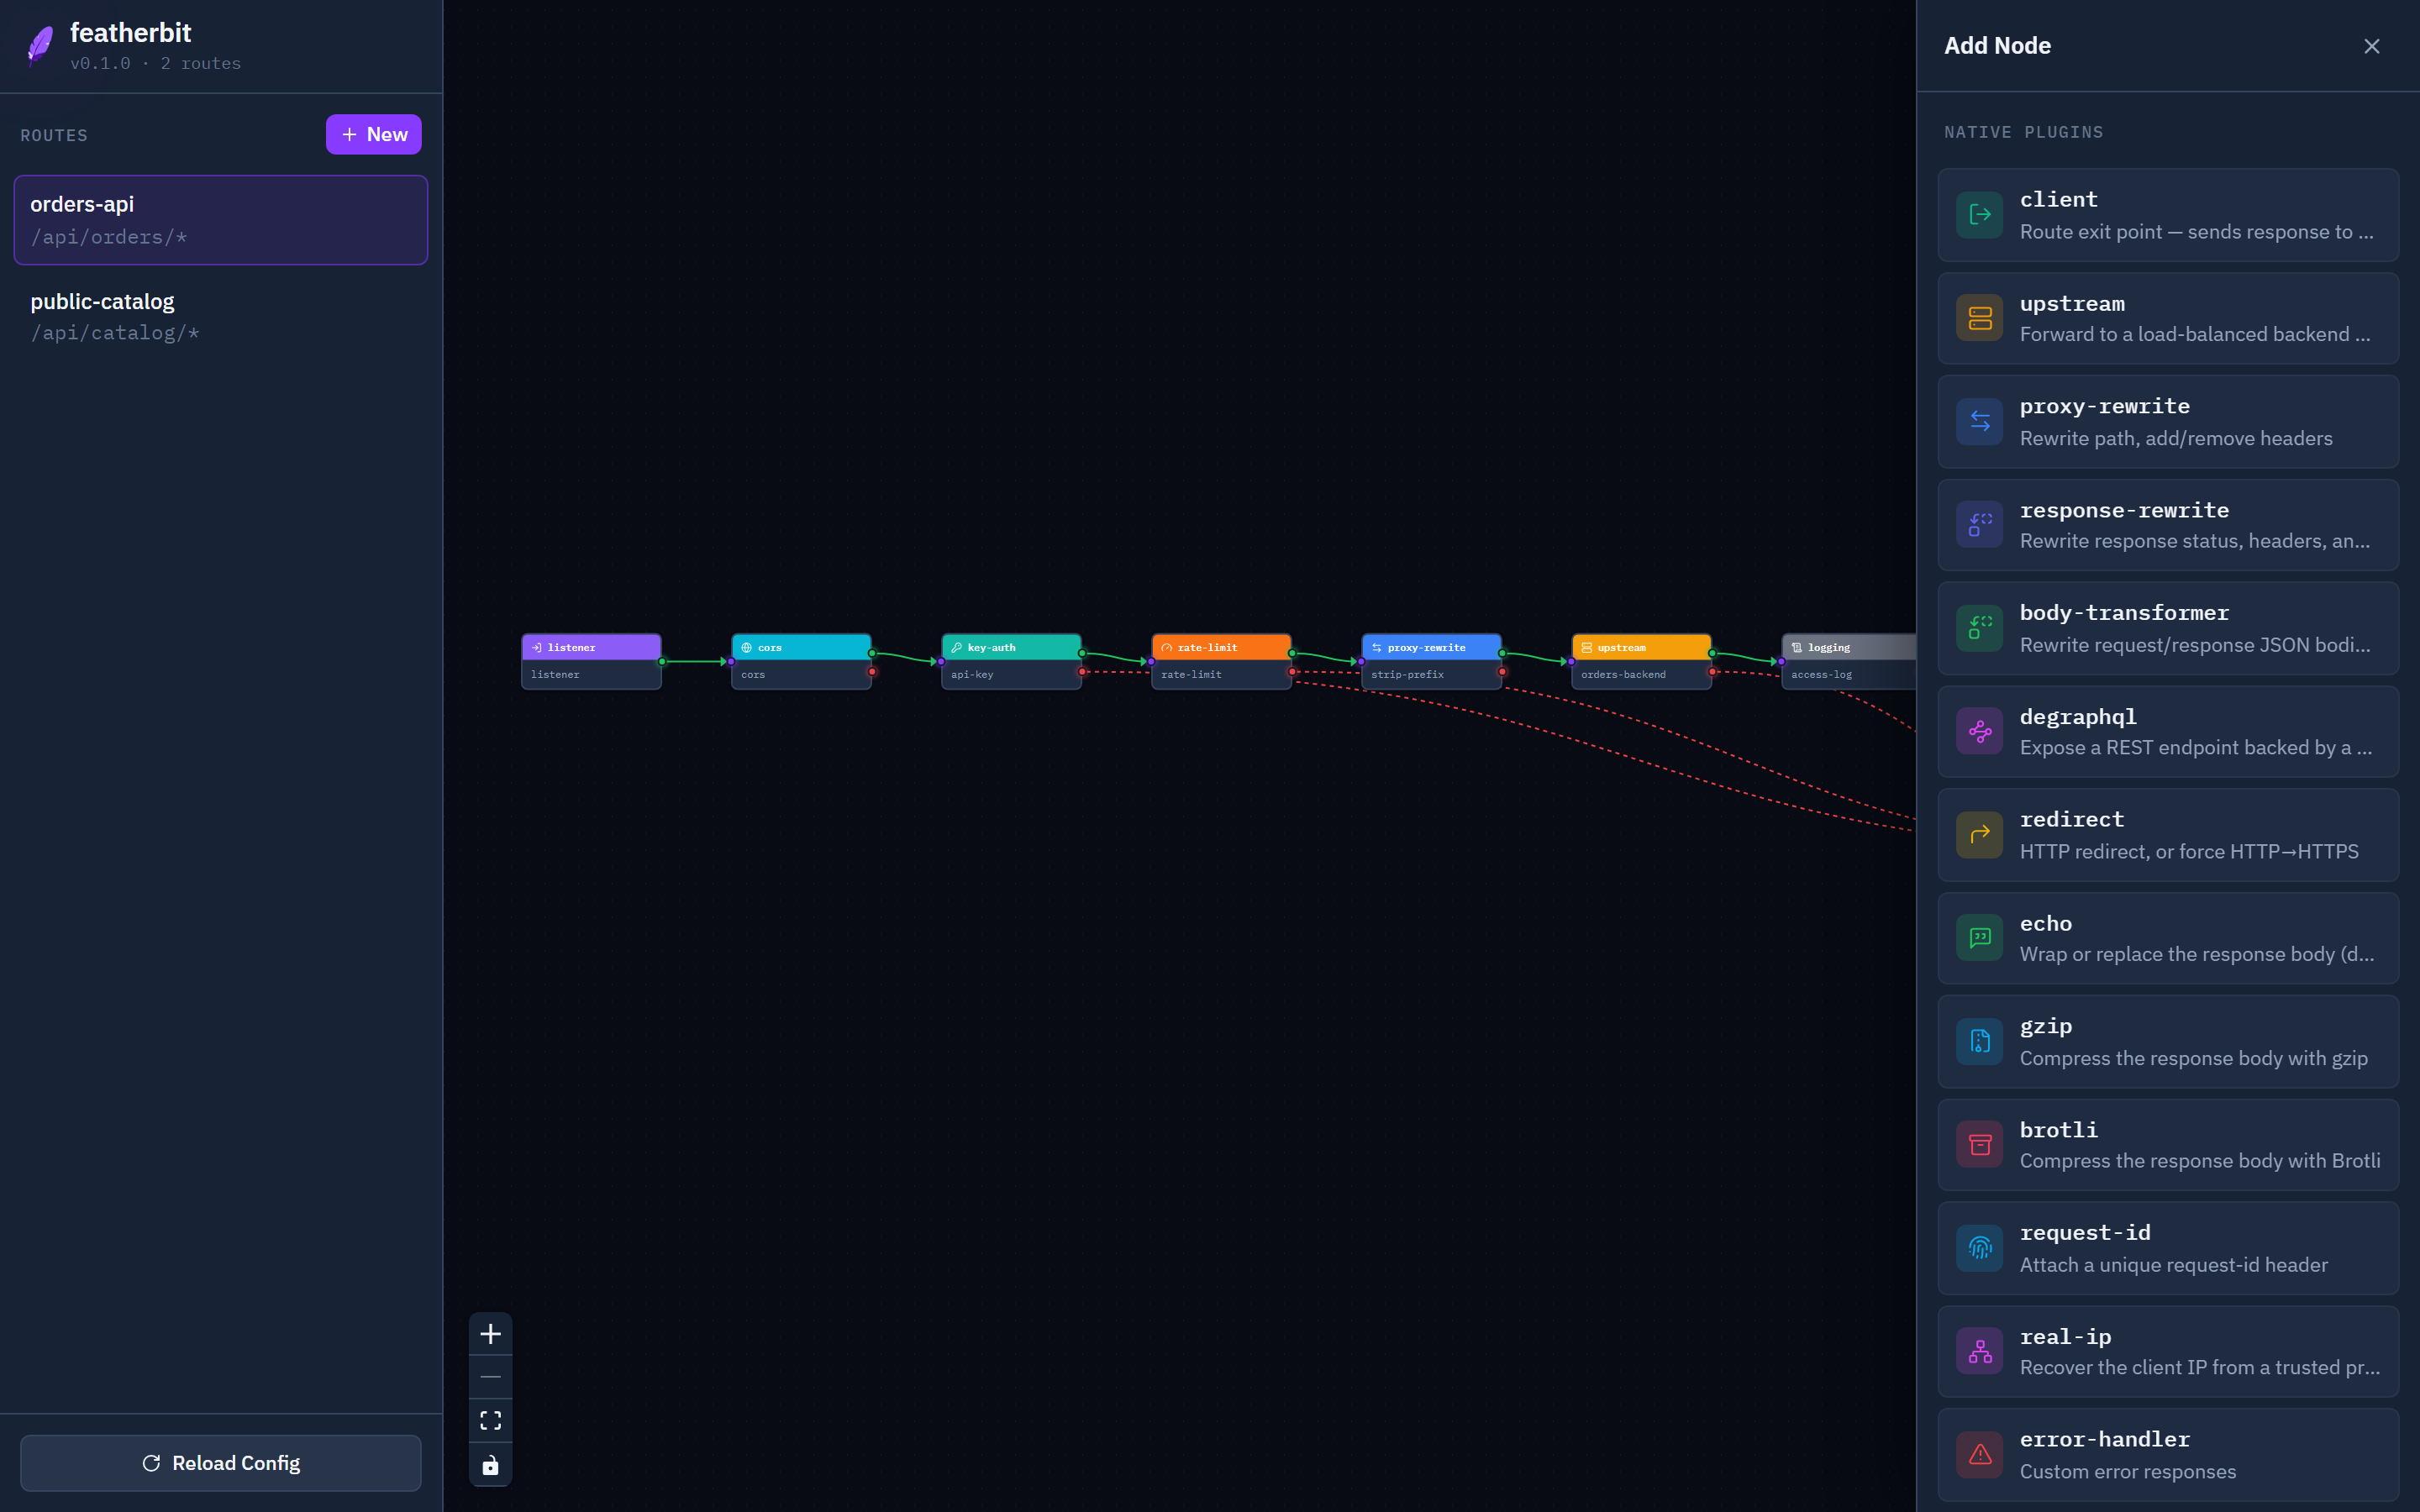
- Add plugins from the plugin drawer (Add Node). The palette is populated from
GET /api/pluginsand offers every node type the gateway can build. - Wire nodes by dragging from output ports to input ports — green ports are
success, red ports areerror. A complete pipeline runs fromlistener.outthrough the plugin chain toclient.in. Each output port carries exactly one edge — dragging from a port that is already wired rewires it to the new target (the engine rejects fan-out at compile time, so the canvas never lets a graph get into that shape). Inputs accept any number of edges — several paths may converge on the same node (fan-in). The one connection the canvas refuses outright is an edge that would close a loop (including a node wired to itself): policies must be acyclic, and the compiler rejects a cyclic graph on save. - Configure a node by clicking it: the inspector panel shows a schema-driven form for that plugin type's config keys. Types without a declared form get a raw-JSON config editor instead. Typing
{{in a text field opens a suggestion popover for{{namespace.path}}templates (reference) — full request/response/message/client context suggestions with live-value preview, plus environment-variable names, on fields the plugin actually renders through the template engine; everywhere else the same{{-triggered popover offers environment-variable names only (never values), inserted as${NAME}rather than{{env.NAME}}since those fields never get parsed as a template — only the older, universal${NAME}env substitution actually resolves there (see Templates → exclusions). The handful of fields that still support the legacy$varsyntax additionally trigger a$/${popover. A "Context vars" button in the inspector header opens the full legend — every namespace, the environment names, and the legacy$var→{{path}}mapping — with live values inlined when debug mode has a trace for the selected node. - Preview a supernode in place: a supernode instance carries an expand chevron in its header — click it to grow the node into a zoomed-out, read-only rendering of the definition's inner graph, floating above the neighboring nodes with the instance's edges still attached. Click again to fold it back. The preview is a glance, not an editor (editing a definition happens in the Supernodes library), and expansion is never saved into the policy. Several instances can be expanded at once.
- Save Policy to deploy: the UI writes the policy through the admin API, which validates, recompiles, and hot-swaps the route graphs — no restart.
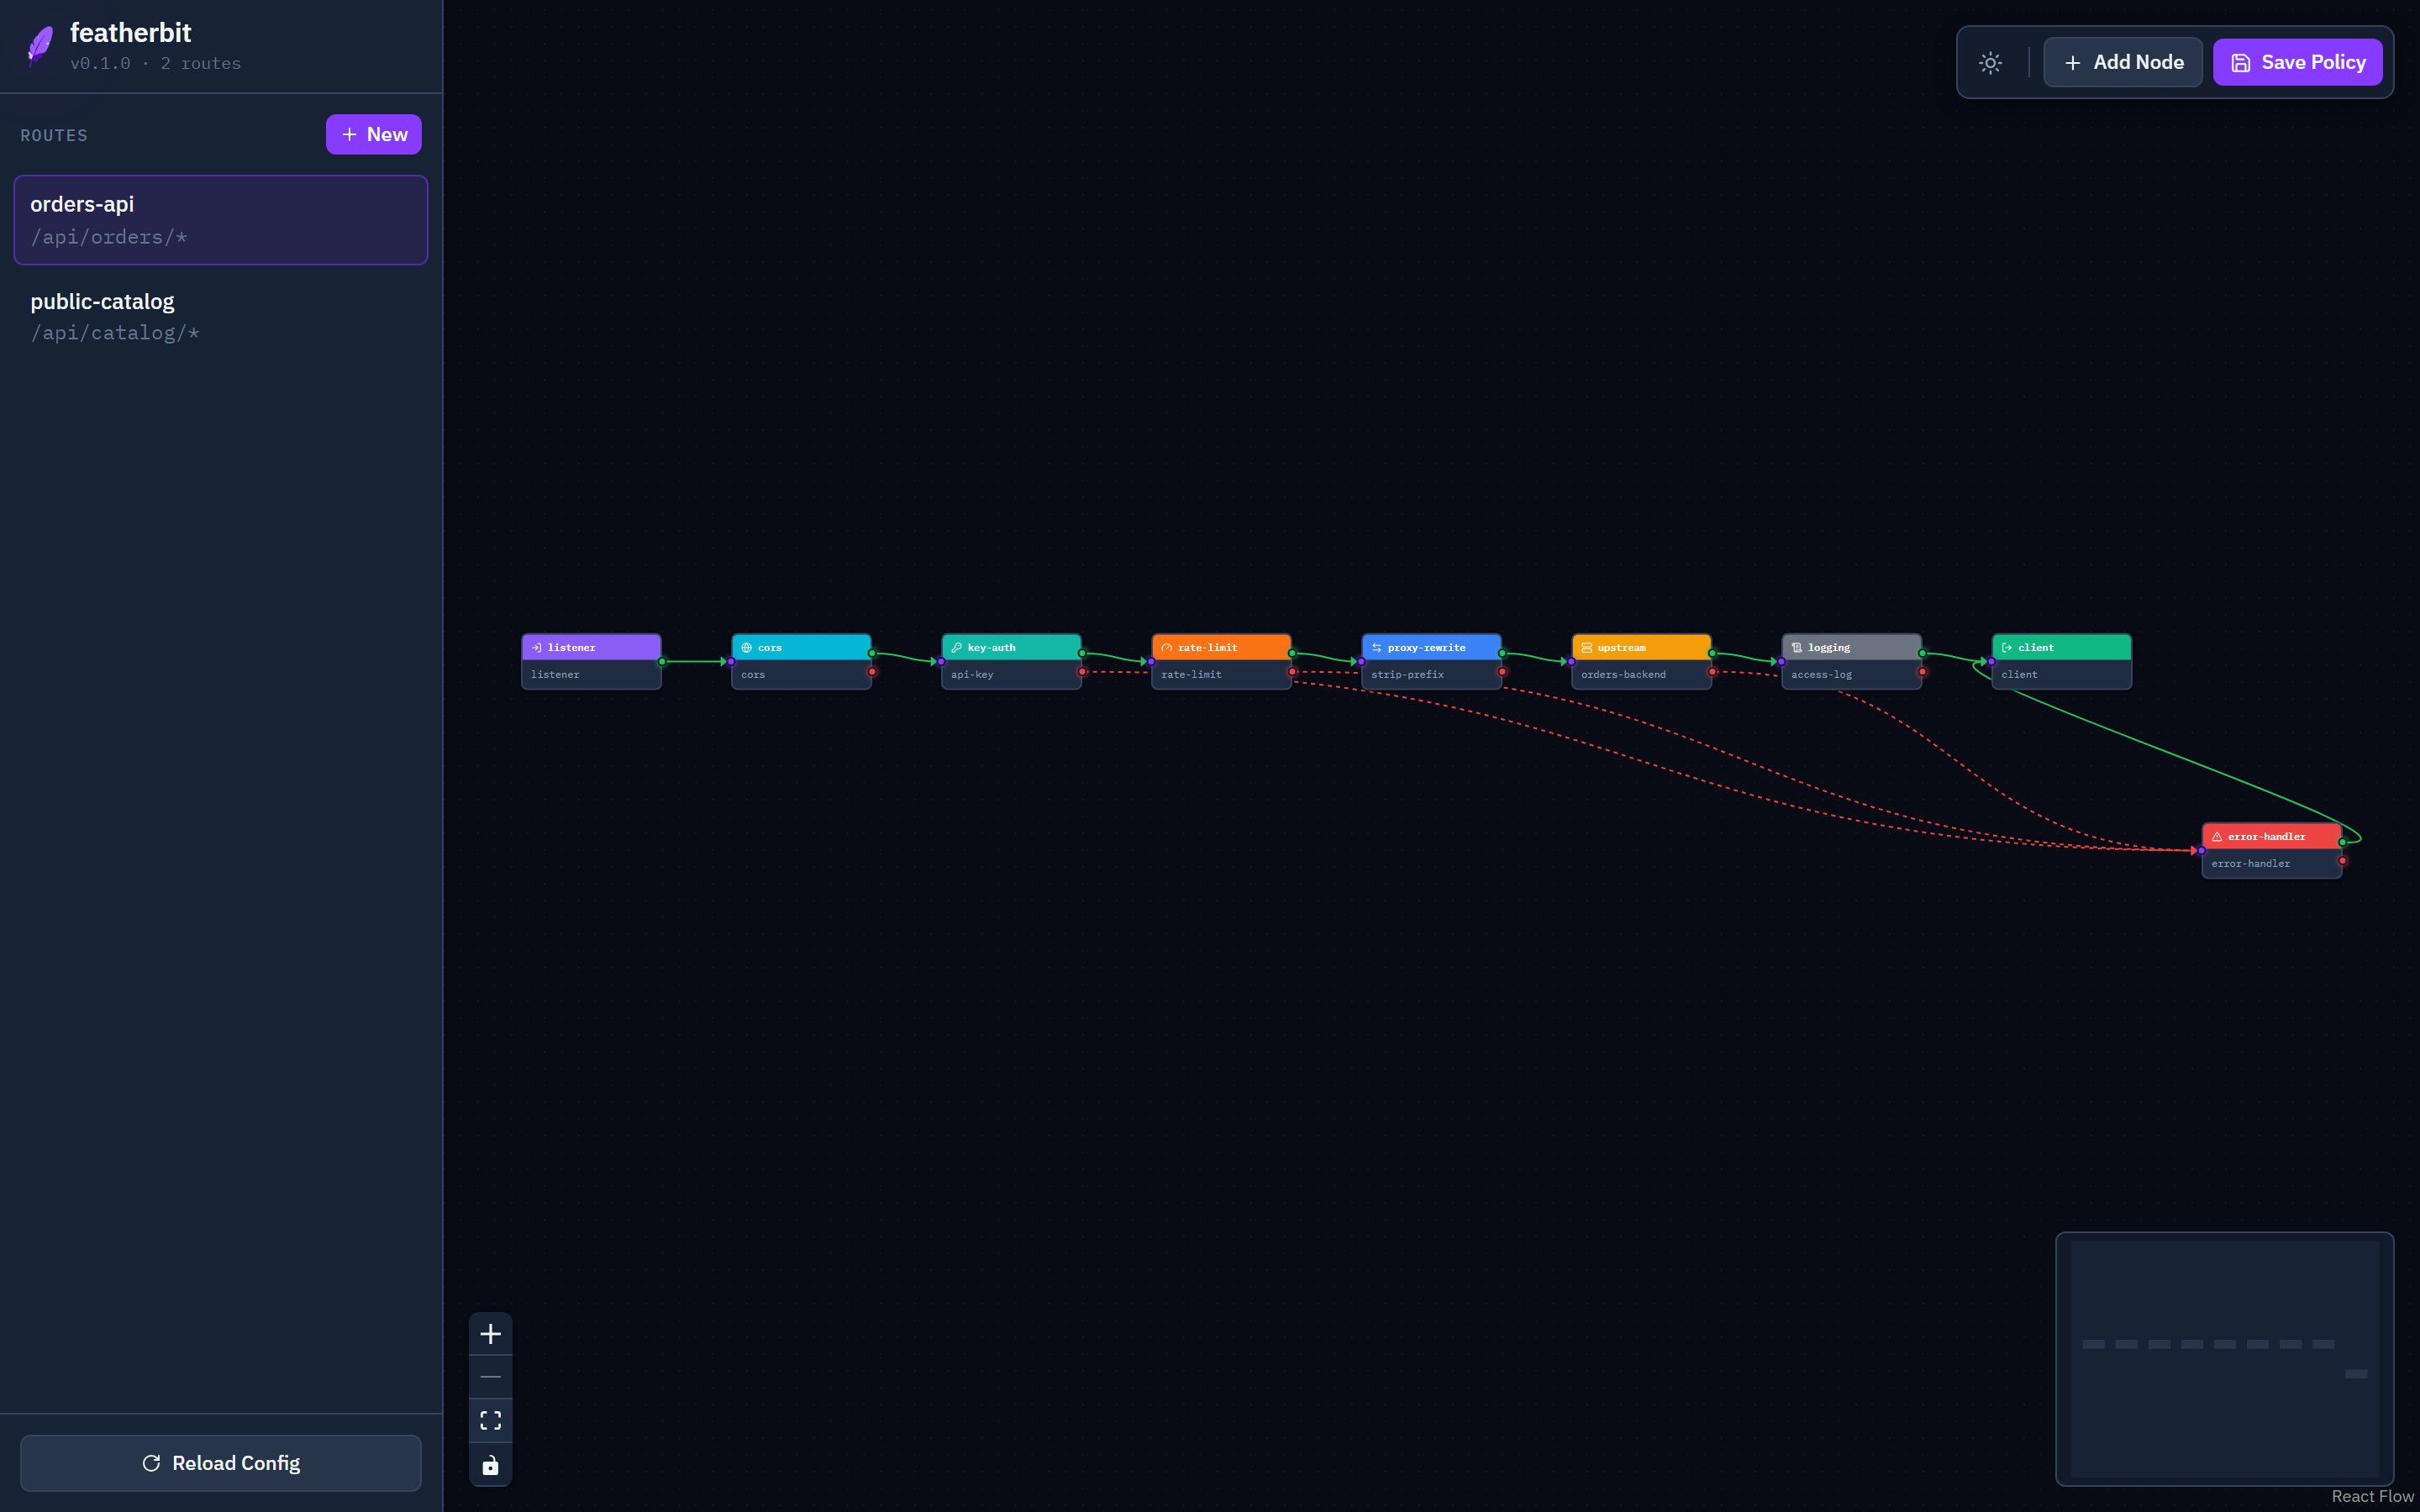
- Toggle dark/light mode with the theme button.
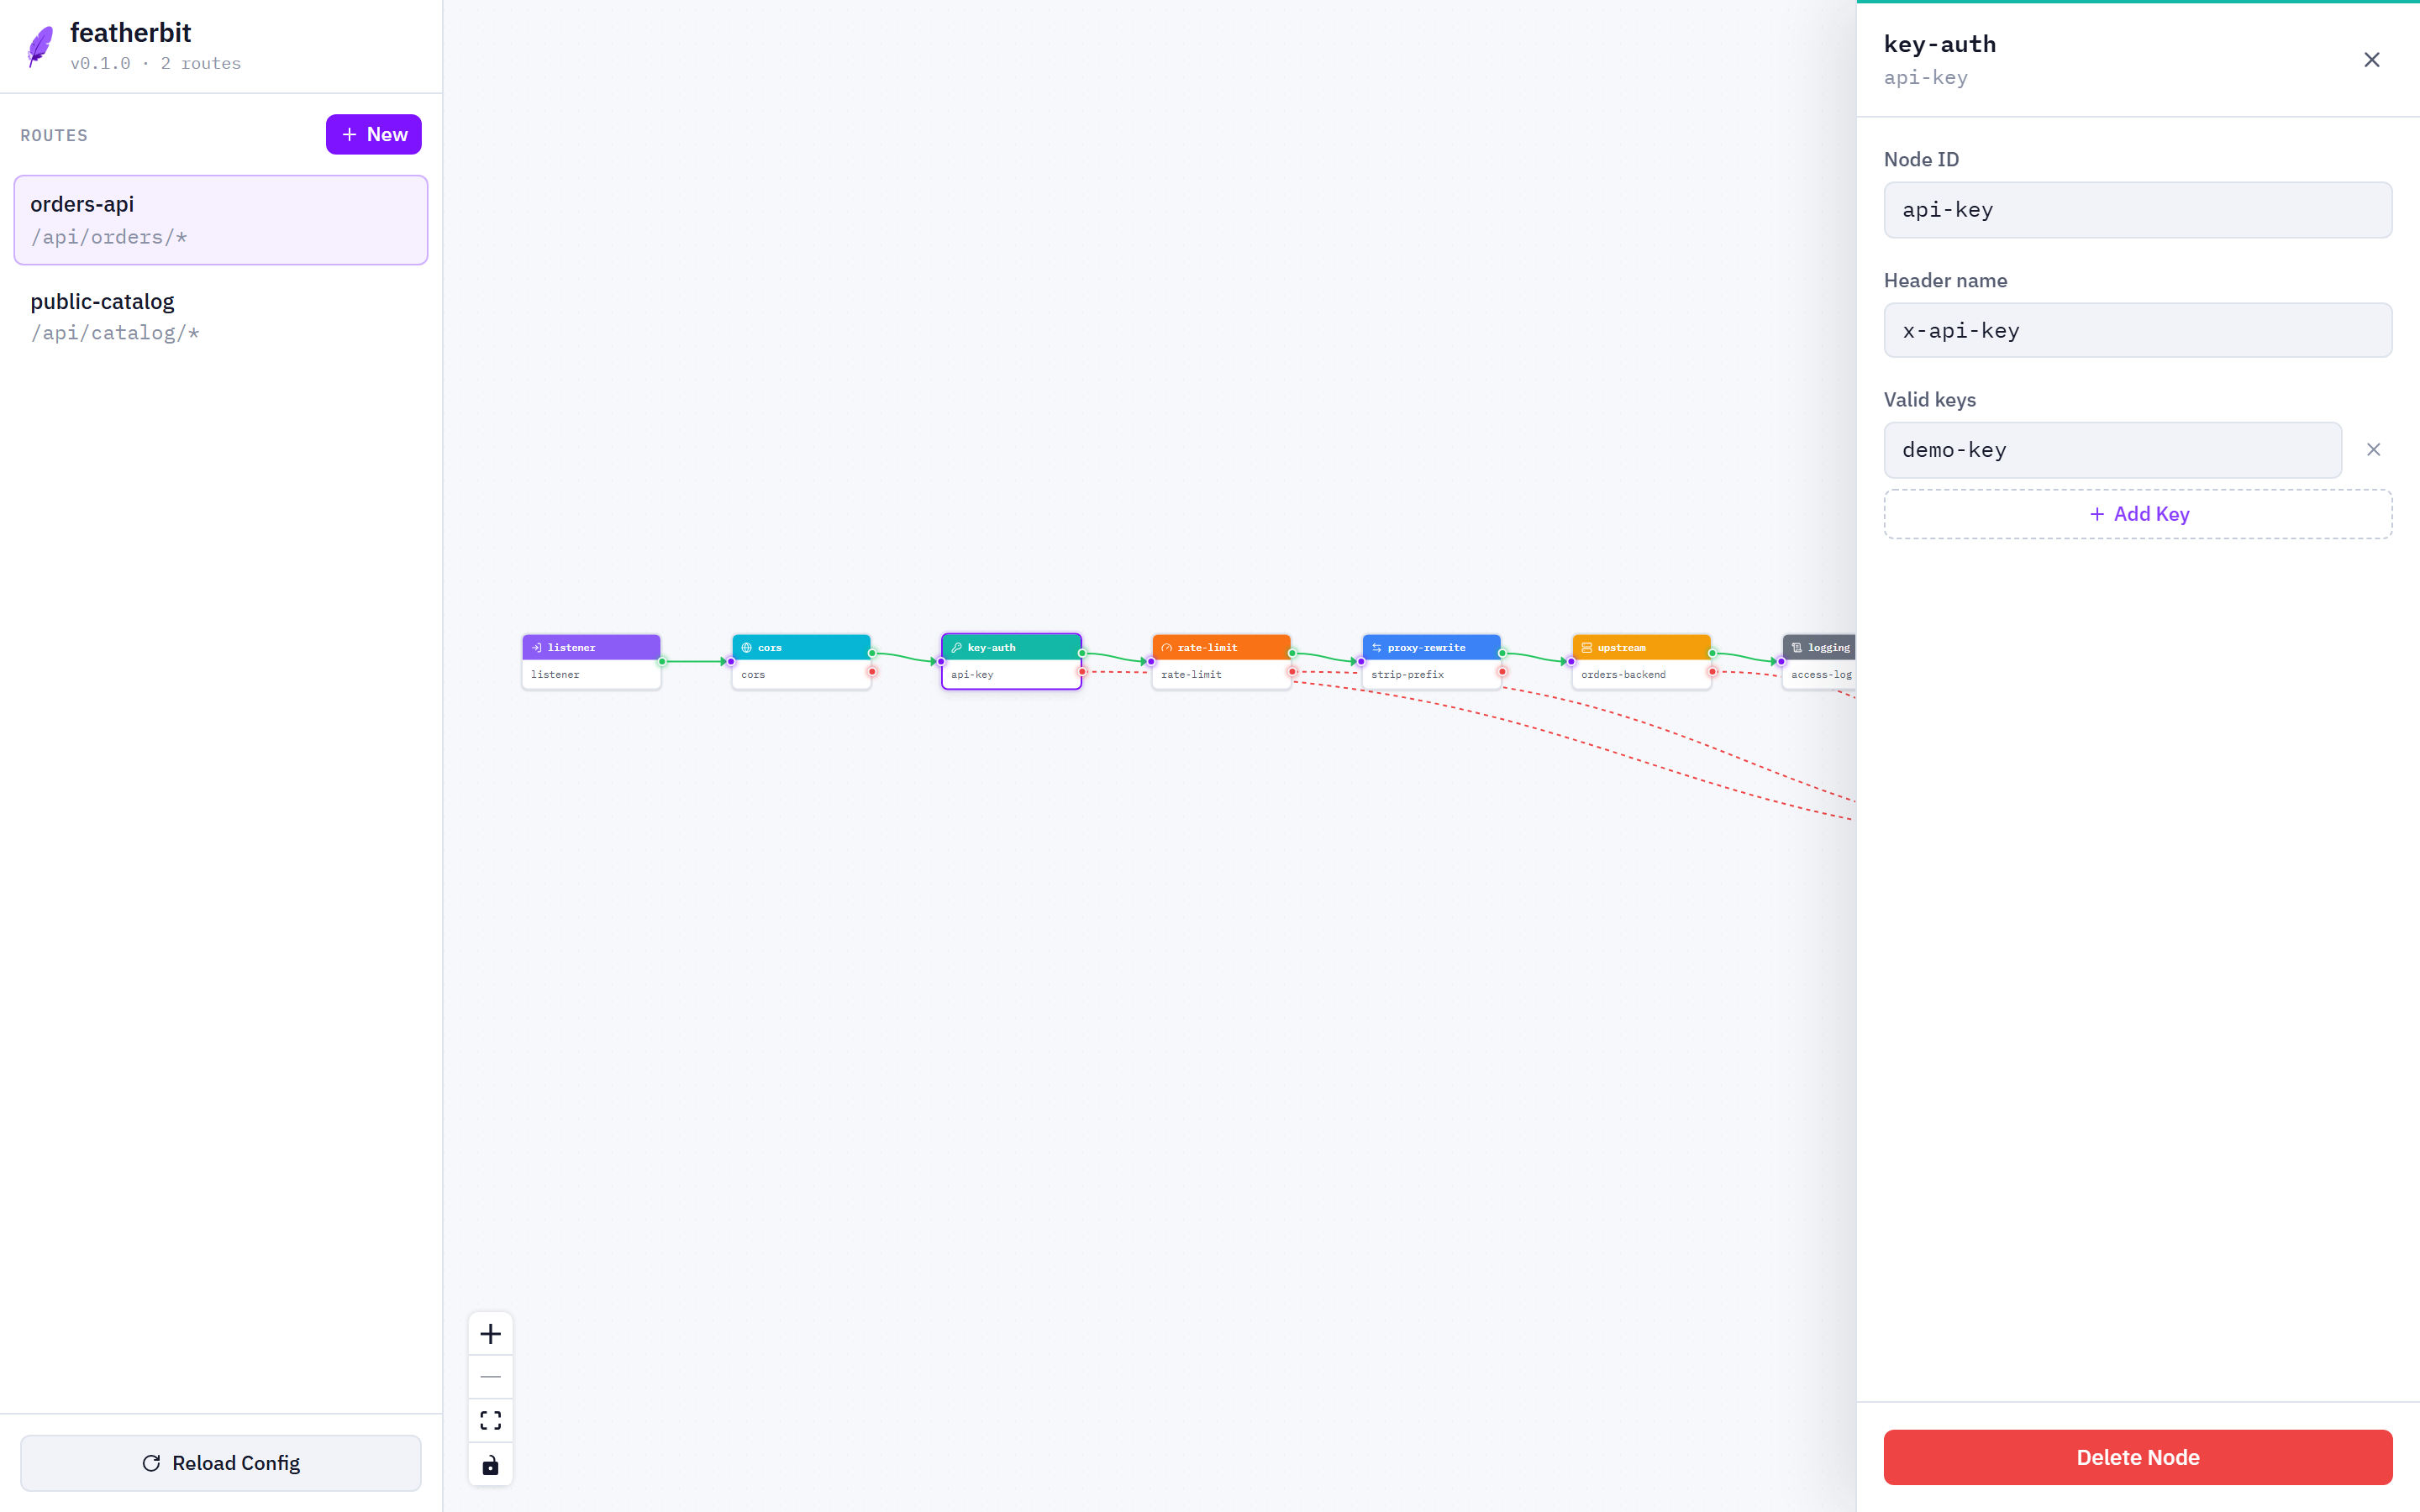
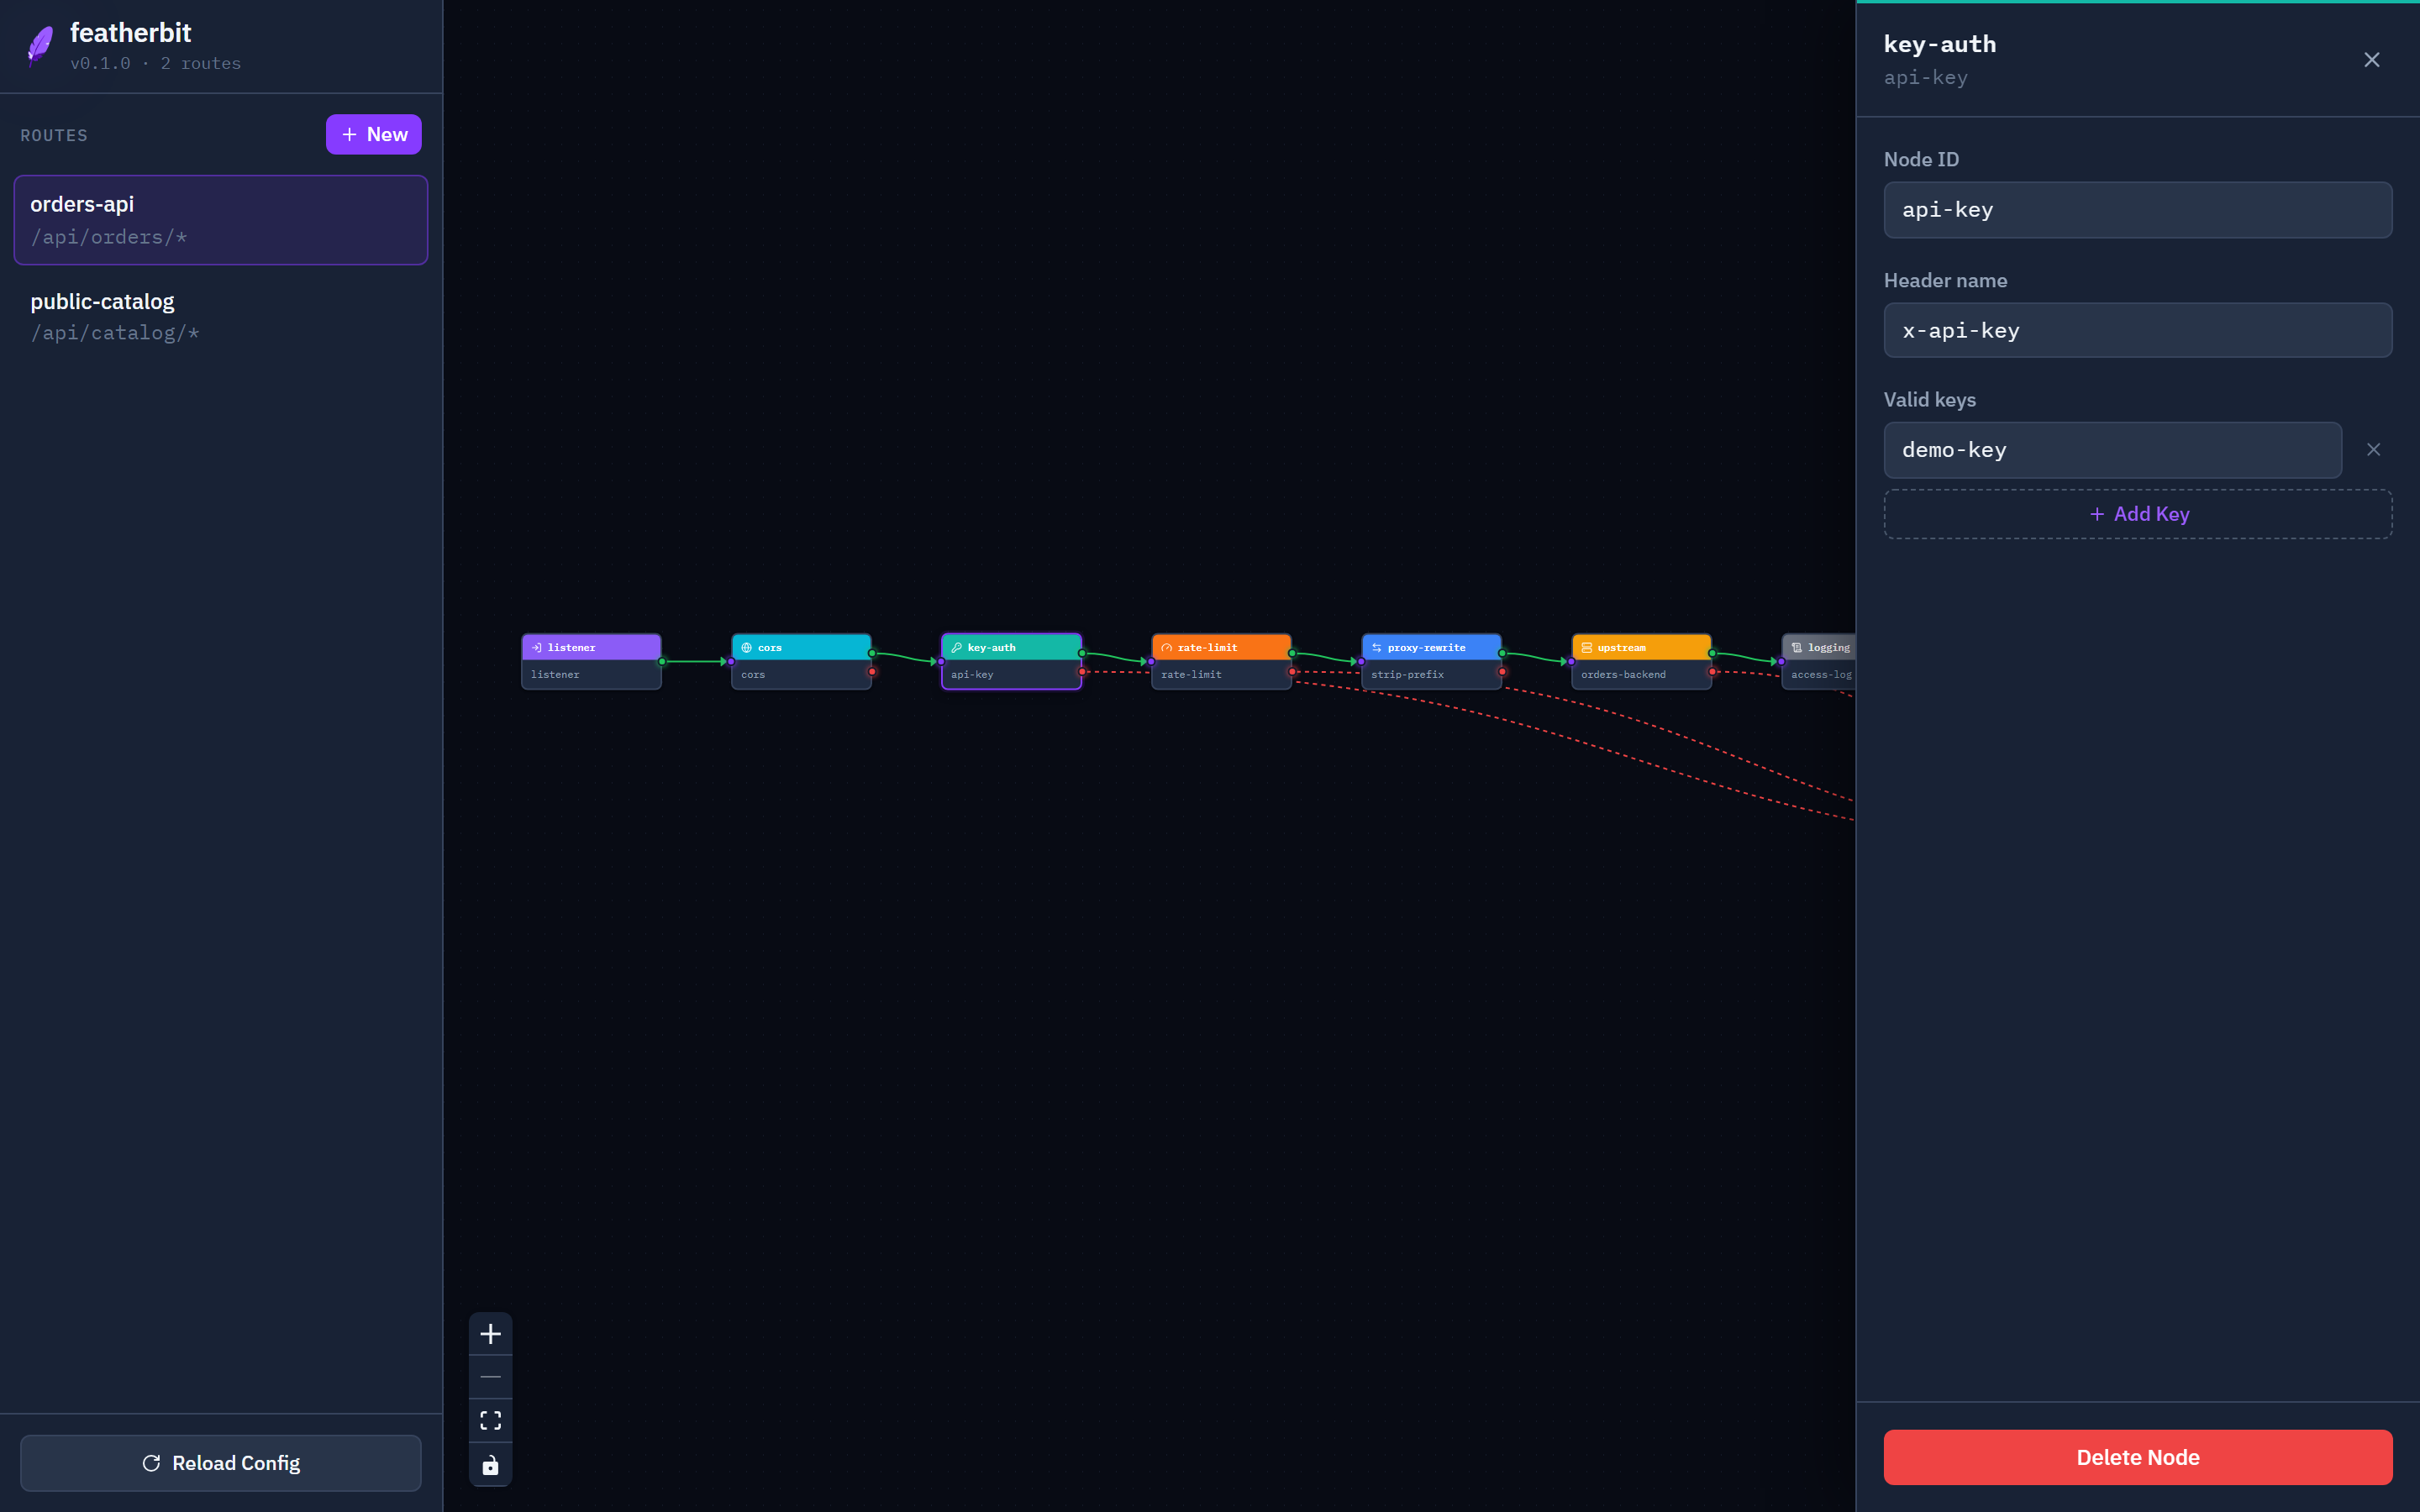
Node positions on the canvas are stored in each node's position field in the policy; the graph engine ignores them, and they are omitted from serialized output when unset.
Building supernode definitions
Opening a supernode from the Supernodes section of the sidebar puts the canvas into definition mode: the plugin drawer hides listener, client, and supernode (a definition can't nest any of those) and adds an Output port entry and an Error port entry under a "Boundary" heading instead. Dropping either prompts for a port name in a small dialog, validated per-kind against the reserved boundary ids (output/error: output ids may not be input/error/in/out/success; error ids may not be input/output/in/out/success) and the definition's existing node ids — each drop adds one more type: output or type: error boundary, so a definition can carry as many named exits and named error exits as it needs.
An output or error boundary's Node ID field is editable — click it and the inspector shows a Rename button (input stays fixed, as the sole boundary of its kind). Renaming a boundary renames the port itself, since the node's id is the port name; the canvas rewrites every edge that referenced the old id to match. Renaming or deleting the error boundary named error removes it as the black-box default — inner nodes that relied on an implicit error edge now need one wired explicitly (or to a different named error boundary if one remains).
The inspector's Delete Node button also appears for output and error boundary nodes (input still has none — it's fixed). Deleting one removes the boundary and any edges into it; the button is disabled with an explanatory tooltip ("A supernode needs at least one output/error boundary") on the last boundary of its kind, mirroring the server-side rule that a definition must keep at least one of each.
Back on a policy canvas, a supernode instance node renders one port row per port its definition exposes — success (if the definition has an output-id boundary), then named outcome ports in definition order, then the error-kind ports in the order their boundaries appear in the definition — instead of the fixed success/error pair from before named ports existed.
Extracting a selection into a supernode
Instead of building a definition from scratch, a group of existing policy nodes can be lifted straight into a new supernode. Multi-select two or more nodes on a policy canvas (Ctrl/Cmd-click each node, or drag a box with Shift held to select everything inside it), then trigger extraction one of three ways: the toolbar's Extract Supernode button, Extract selection as supernode… on the right-click context menu, or the same entry in the Ctrl+K command palette. The toolbar button is hidden until the selection is eligible, the context-menu entry is grayed out, and the palette entry stays available and explains itself via a toast if the selection isn't eligible yet.
Eligibility:
- No
listener,client, orsupernodenode in the selection (a definition can't nest any of those). - Exactly one entry node — every edge coming in from outside the selection must land on the same node.
- At least one non-error exit edge leaving the selection.
- No node in the selection has the id
input,output, orerror— those ids are reserved for supernode boundary nodes, and extraction refuses a selection that has one: "Rename node 'output' before extracting — that id is reserved for supernode boundary nodes".
A selection that fails any of these shows an error toast naming the problem instead of extracting. There is no requirement that error exits share a single outer target — see below.
What gets derived: the entry node is wired from a new input boundary; each non-error exit edge becomes its own output-type boundary named after its source port (success/out exits map to the output-id boundary, i.e. the instance's success port), with duplicate names deduped by a numeric suffix. Error exits are grouped by outer target, in edge order: the first target found gets the default error boundary, and each further distinct target gets its own named error boundary (error-2, error-3, …) — so a selection whose error edges fan out to two different outer nodes produces two error boundaries on the new definition, both wired by construction, and both renamable afterwards like any other named error port. (The old rule requiring every error exit to share one target is gone.) Internal edges and node configs carry over unchanged.
One dialog asks for the new definition's name. On confirm, the definition is created immediately through the Admin API and the selected nodes on the canvas are replaced by a single wired instance — the policy itself is not saved automatically, same as any other canvas edit, so Save Policy is still required to deploy it. If creating the definition fails, nothing on the canvas changes.
Agent panel and agent prompts
The footer's Agent button opens the MCP connection panel: the endpoint URL, copy-paste client configs (Claude Code, mcpServers JSON, curl) with a <TOKEN> placeholder you fill from your system.yaml tokens, a read/write scope explainer, and the library of precompiled prompts, each with its own Copy button that prompts for any required arguments first (e.g. diagnose_route's method/path). With MCP disabled it shows the config to set instead.
The prompts also drive the built-in Chat: in the Debug panel a trace has Troubleshoot with AI (opens the chat with the trace and works out why the client got that status) and a selected step has Ask AI about this step; the policy editor's toolbar has Review with AI, and the Ctrl+K palette has AI: design a policy/supernode/route… (asks for the goal). To use an external agent instead, the trace header's Copy prompt and the Agent panel's prompt library copy the same prompts with the relevant data inlined plus a line telling a connected agent to prefer the live MCP tools. See MCP server for agents.
Chat
The footer's Chat button (or Ctrl+K → Open Chat) opens a conversation with an OpenAI-compatible model that can use this gateway's MCP tools while it answers. It runs entirely in your browser: the gateway never sees your provider key, stores no conversation, and runs no model of its own.
The gear icon holds the settings — base URL (any compatible server: OpenAI, Azure, OpenRouter, a local Ollama), model, API key, and an MCP token from admin.mcp.tokens. The model field is a searchable dropdown over the provider's own GET /models list; it loads by itself once the base URL and key are both set, and Load models fetches it on demand for an endpoint that serves the list unauthenticated. Leave the MCP token empty for a chat with no tools.
Threads live in this browser's local storage, newest 50 kept. Each has Delete, Clear all chats removes them all, and Forget credentials drops the key and token while keeping the base URL and model.
How tools run. Read tools run as soon as the model asks for them. Write tools (put_*, delete_*, reload_config) stop for a card with Run and Skip — Skip tells the model you declined so it can propose something else. run_sandbox asks too, even though its scope is read, because it executes the nodes the model just wrote. Tick Auto-run writes to let a session apply changes without stopping; the connection line says so while it is on, and the toggle is disabled for a read-only token. Repeated attempts at a failing tool collapse into a single card showing the current try and the earlier ones. A turn stops after 16 tool rounds, and Stop aborts the request in flight.
Secrets. The gateway already keeps most secrets away from the chat — traces redact at capture, MCP masks consumer credentials, stored config keeps raw ${ENV} placeholders. On top of that, Redact secrets before sending (on by default) rewrites credentials, cookies, secret-looking config values, JWTs and PEM blocks to [REDACTED] before anything is stored or sent to the provider. It is a heuristic, not a guarantee: keep genuinely sensitive bodies out of the traces you hand a third-party model. Because the model only ever sees [REDACTED], a redacted value it reads would be written back literally if it proposes a put_* — check the card's arguments, and keep secrets as ${ENV} placeholders, which are never redacted.
When a reply ends early, the panel says why — a reply cut off at the output-token limit, one the provider filtered, an empty reply, or a mid-stream provider error all render as a notice rather than silence. Long reasoning that consumes the whole output budget is the usual cause.
Stores, sessions and certificates
Three footer panels manage runtime resources that live outside a policy graph:
- Stores — the named redis/valkey connections declared under
stores:(see Shared stores & sessions). Create, edit and delete them, with${ENV}placeholders round-tripped verbatim so the UI never resolves a secret, and a Ping action reporting latency and server version. A store still referenced by a node or shared plugin config refuses to delete, naming each referrer. - Sessions — server-side sessions for the interactive auth plugins: filter by store, subject or plugin, revoke one row, or revoke every session for a subject. Metadata only — payloads never leave the store. A build without the
redis-storefeature says so instead of failing. - Certificates — the ACME-managed certificates: state, domains, validity, next renewal and last error, with a per-certificate Renew now. Read-only otherwise; ACME configuration lives in
system.yamland is restart-gated like every TLS setting.
Headless mode
The UI is optional. It is only a client of the admin API, and it edits exactly the same data that lives in gateway.yaml — a policy saved from the canvas and a policy written by hand in YAML are interchangeable. Everything the UI does can be done with the YAML files plus hot-reload, or with the Admin API directly.
Omitting the admin section from system.yaml disables the admin server entirely (no API, no UI); the data plane still runs from the YAML configuration.
There are two mechanisms to run without the UI:
- Runtime: Set
admin.ui_enabled: falseinsystem.yamlkeeps the admin REST API available but returns 404 for UI paths. A restart is required for this setting to take effect. - Compile time: The
-headlessDocker image tags (latest-headless,edge-headless,X.Y.Z-headless) omit the UI entirely at build time, reducing binary size and attack surface.
Building the UI
The gateway build embeds whatever is in ui/dist/, so build the frontend first:
cd ui && npm install && npm run build && cd ..
cargo build
cargo build embeds ui/dist/ as it finds it — it does not rebuild the frontend, and it will happily embed a stale bundle without a warning. After changing anything under ui/src/, re-run npm run build before cargo build, or the binary keeps serving the previous UI.
For UI development, npm run dev starts a dev server with HMR that proxies /api to the gateway admin port.
Screenshots in these docs
The UI screenshots on this site are captured from the real binary, not mocked up. website/screenshots/capture.mjs boots the gateway against a posed demo config, drives the editor with Playwright, and writes both light and dark variants to static/img/ui/:
cargo build --release
cd website && npx playwright install chromium && node screenshots/capture.mjs
Re-run it after a UI change so the docs images do not drift from the product.